Monday, June 6, 2011

Easy Smocked Top


Have you ever seen this smocked material at the fabric store before? I'm sure you have. I've been wanting to try it out and use it for awhile now and finally got around to giving it a whirl. They have all sorts of prints and lengths to choose from. I chose the simple white one in the shortest length to make a little shirt for Ry-pie.

Here's how I put it together :


Measure around your little ones chest. Ry-pies chest measured just shy of 19" so I cut the fabric at 19 1/4" to allow for a little seam allowance.

Place cut sides, right sides together and serge. If you don't have a serger just sew up the side and then zig-zag stitch or cut with pinking shears to prevent fraying.


Take some ribbon. I didn't have any white grosgrain ribbon so I used this skinny little satin ribbon for the straps.

I put the shirt on Ry-pie and measured how long I wanted the straps and decided where to place them. Since these straps are so skinny I cut 4 sets of ribbon, 3 ribbon per set - all 10" long.

I marked the placement of the straps with my straight-pins.

I placed the ribbon on top of the first and second rows of smocking. I then sewed the ribbon across each of the smocking to make sure it was nice and secure.

And there you have it! An easy and nice and breezy little smocked top! :)

I love the tie-straps at the shoulders....

that is if your little one doesn't keep un-tyeing them.

She looks super thrilled doesn't she?

A definite diva with her hand on the hip move.


Friday, June 3, 2011

No-bake berry pie


Here's a delicious little recipe that we enjoyed on Memorial Day. Perfect for anytime when the weather is nice, especially because you don't have to heat up your oven!

Ingredients:
a pack and a half of Oreos
mixed berries (I used raspberries, strawberries, and blueberries)
one large container of Cool Whip
one package of cream cheese (softened)
1/4 C butter (melted)

In a food processor, grind Oreos into fine crumbs.

Add melted butter and mix together.

Press crumb mixture into pan. I used a spring-form pan but a pie dish would work just fine too.

In a separate bowl mix cream cheese until nice and smooth.

Add entire of container of Cool Whip and fold gently into cream cheese.

Layer cream cheese/Cool Whip mixture onto crumbs. Smooth out so the surface is relatively even.

Place your berry mixture on top of your Cool Whip mixture, and refrigerate for at least an hour.

If using a spring-form pan simply slide out. If using a pie plate just cut and serve from that.

Super delicious!


Tuesday, May 31, 2011

Ry-pie's First Haircut

Ry-pie's turning 2 at the end of June. She's yet to have a haircut. I guess with all those curls I just didn't think it was necessary. That is until this tiny tendril kept driving me crazy! It's so weird, this one perfect curl about 2 inches longer then the rest. I finally decided to give her a little trim.

Snip, snip.

She didn't even notice.

And I feel much better.


Now, if I could only get the front under control!


Friday, May 27, 2011

Room Re-do

We've been making some changes in our household lately. We're expecting baby number 3 in late August so we've been updating our kids rooms. Ry-pie and baby number 3 will be sharing a room and Cal J (of course) will have his own. Cal J's room was a tad bigger then Ry-pie's so we decided to pull a switch-a-roo so Ry-pie and the new baby would have a little bit more wiggle room.

Josh painted Ry-pie's room a lovely shade of Ballet Slippers Pink, I still can't believe we chose pink, I'm not a pink girl at all, but with a second little girl on the way I'm slowly coming around! I basically have to give the re-decorating credit to Josh. He bought this adorable little wall decal from Etsy. He picked it out, set up his own Etsy account and bought it! He tracked it everyday and when it came in he worked hard putting it up. He wanted to surprise me and Ry-pie so he wouldn't let us see it until it was completely done. He's kind of a weirdo like that - and that's why I love him so much!

Here it is... Just one little update to "the girls" new room.


This is my most favorite little detail of all!

I'll show you some more updates of the room soon.

Thanks for stopping in!


Thursday, May 19, 2011

Satin Ribbon Flowers


If you haven't noticed by now I have a slight obsession/addiction to all things hair related. What can I say, I LOVE hair accessories!

Here's another little tutorial for some flowers using satin ribbon. I bought this ribbon from Hobby Lobby right off the spool. I purchased a yard of each color.


For the pink ribbon, I cut the ribbon in half so I had two half yard pieces. I used a basting stitch (only backstitching at one end) to sew all the way up one side of the ribbon, about a 1/4" in or so.

If you wanted to, you could even handstitch (loosely) up the entire side of the ribbon instead of machine stitching.

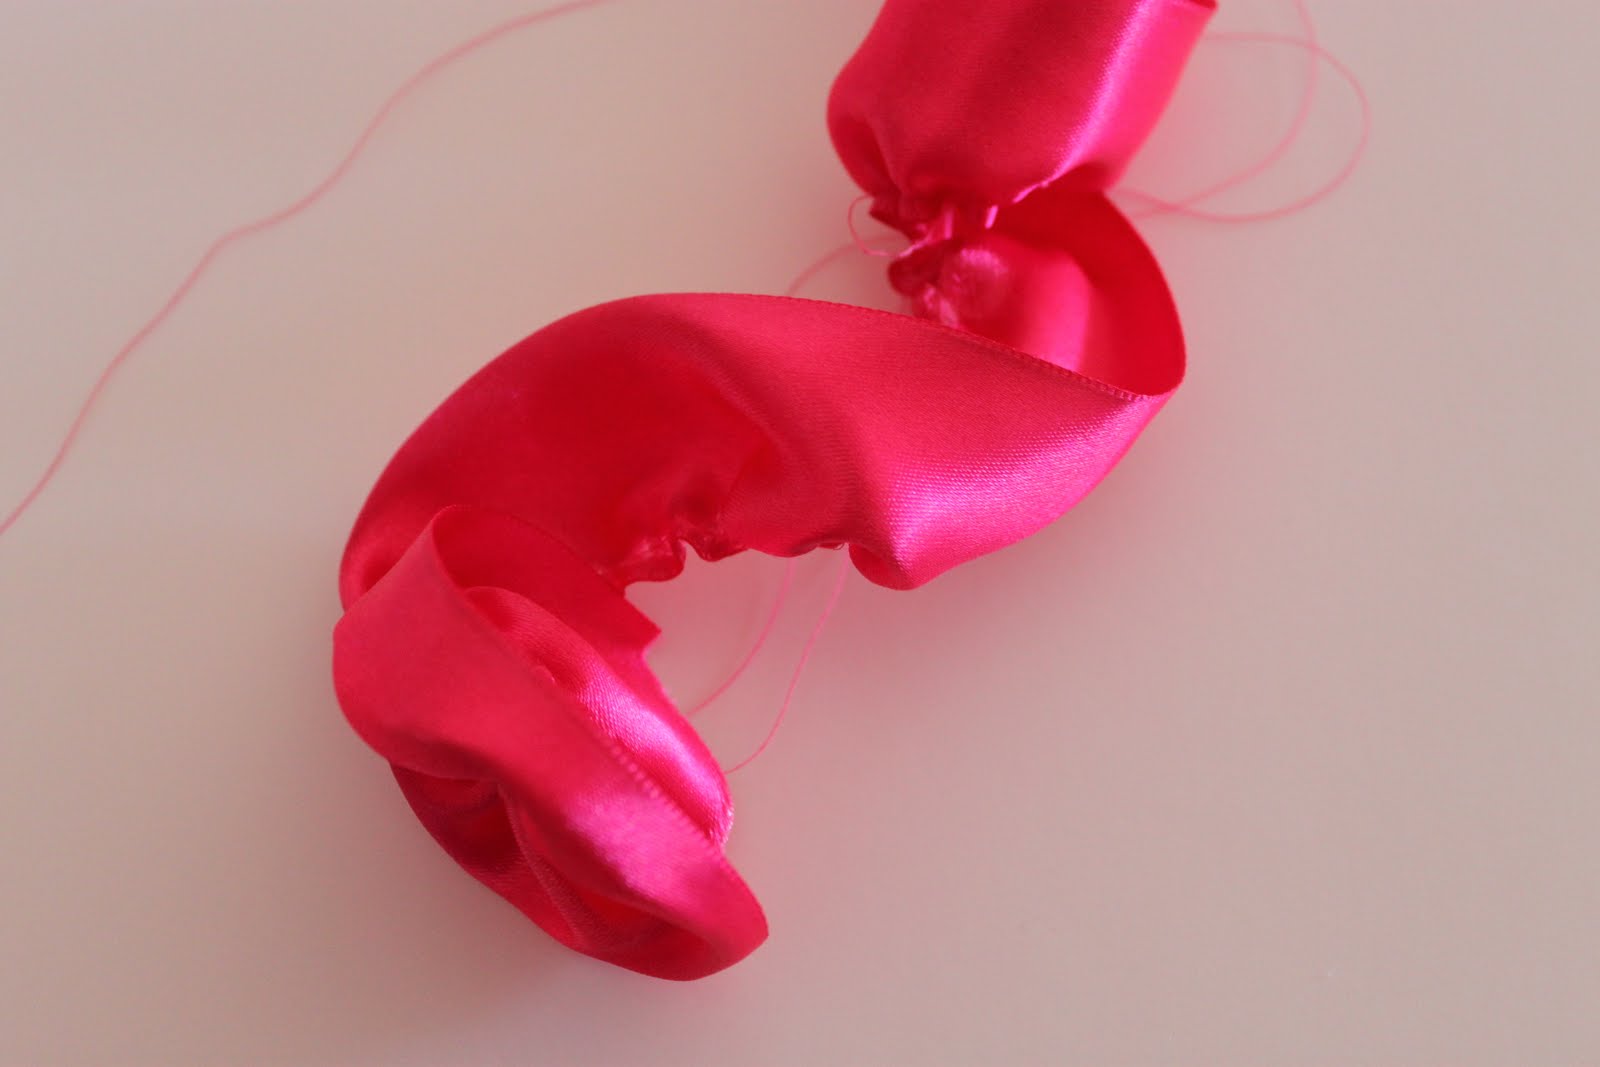
On the end of the ribbon that you did NOT use your backstitch, gently pull one piece of thread while sliding the ribbon up the other thread piece. Do this until your ribbon starts to ripple and ruffle up.

Your ribbon should end up looking like this.


Now start wrapping your ribbon to make your flower. Just keep coiling your flower from the side that you stitched until you have your flower shape. (You might need to keeping pulling the piece of thread to help it stay puckered).

Now handstitch the ribbon to secure your flower. Or you can use fabric glue - that's what I did. Finally, just attach it to a hairclip and your done!

I used the whole yard of ribbon to make the orange one. It turned out to be a big, gigantic, fluffy flower. I kind of (really) like big hair accessories for Ry-pie! Cutting the pink ribbon in half was good for two smaller flowers. Perfect for pig-tails!

I hope you liked this tutorial and make some yourself!


Tuesday, May 17, 2011

Fabric Bows (for ties or hair)


An opera group visited Cal J's school today. His teacher thought it would be cute for his class to dress-up in fancy little opera attire. We don't do suits, or anything remotely close to opera attire in this household. I didn't want to buy anything special so I thought and thought. Bow-ties!!! Of course. He had a button-up shirt and some slacks already so all I had to do was make a super cute (and easy) bow-tie. I found the BEST tutorial from A Lemon Squeezy Home for her bow-ties.


It came out so incredibly cute. I had to make one for Ry-pie - as a hair accessory of course!! I followed the exact same tutorial for the regular bow-tie and just attached it to an elastic headband. Easy and cute.

I want to make one for myself next.

I try not to ask my kids to say "cheese". This is the kind of face they make if I do. And in all of Cal J's cuteness, he kind of looks like a banquet waiter. ha! Notice the glasses? Those are new too. I think they make him look quite studious. :)

Wow. I've accomplished two back to back posts this week. Can I go for three??


Thanks for stopping in!


Related Posts Plugin for WordPress, Blogger...