Showing posts with label headband. Show all posts

Tuesday, December 28, 2010

Fabric headband

Christmas is over. It went by too fast - as usual. Now maybe I can get back to some non-gift-giving-craftiness, and get back to sharing some easy tutorials with you. That's my plan anyway - but please don't hold me to it. :)

Here's an easy little fabric headband that I made for Ry-pie.


You'll need:
Some fabric. I used a 1/4 yard and could have made a couple. You'd probably be fine with at least an 1/8 yard
Rotary cutter
3/4" elastic (length varies to your size of headband)
Sewing machine and thread

Cut out your fabric. This one was 4" wide and 16" long.


Hem each long side. Fold over each long side 1/4" and iron...


Fold over another 1/4", iron and pin. Do this for both long sides.

Sew up each long side, close to the folded edge.


Take a 2" piece of fabric (mine being 8" long) and fold in half, right sides together. Sew long sides together, backstitching at the beginning and end.


Turn material inside out as shown here to create a tube. Cut elastic piece. (This one being 4").


Place safety pin on one end of elastic and feed it through the tube.


You're fabric should be completely scrunched up onto the elastic like this. Attach you safety pin to one end of the elastic AND the fabric so they are pinned together. **Keep your finger on the other end of elastic and fabric so your elastic doesn't go back into the tube. **


Place the unpinned side of the elastic (making sure the edge of the elastic is lined up with the edge of your tube) seam side up onto the right side of the wider headband fabric.
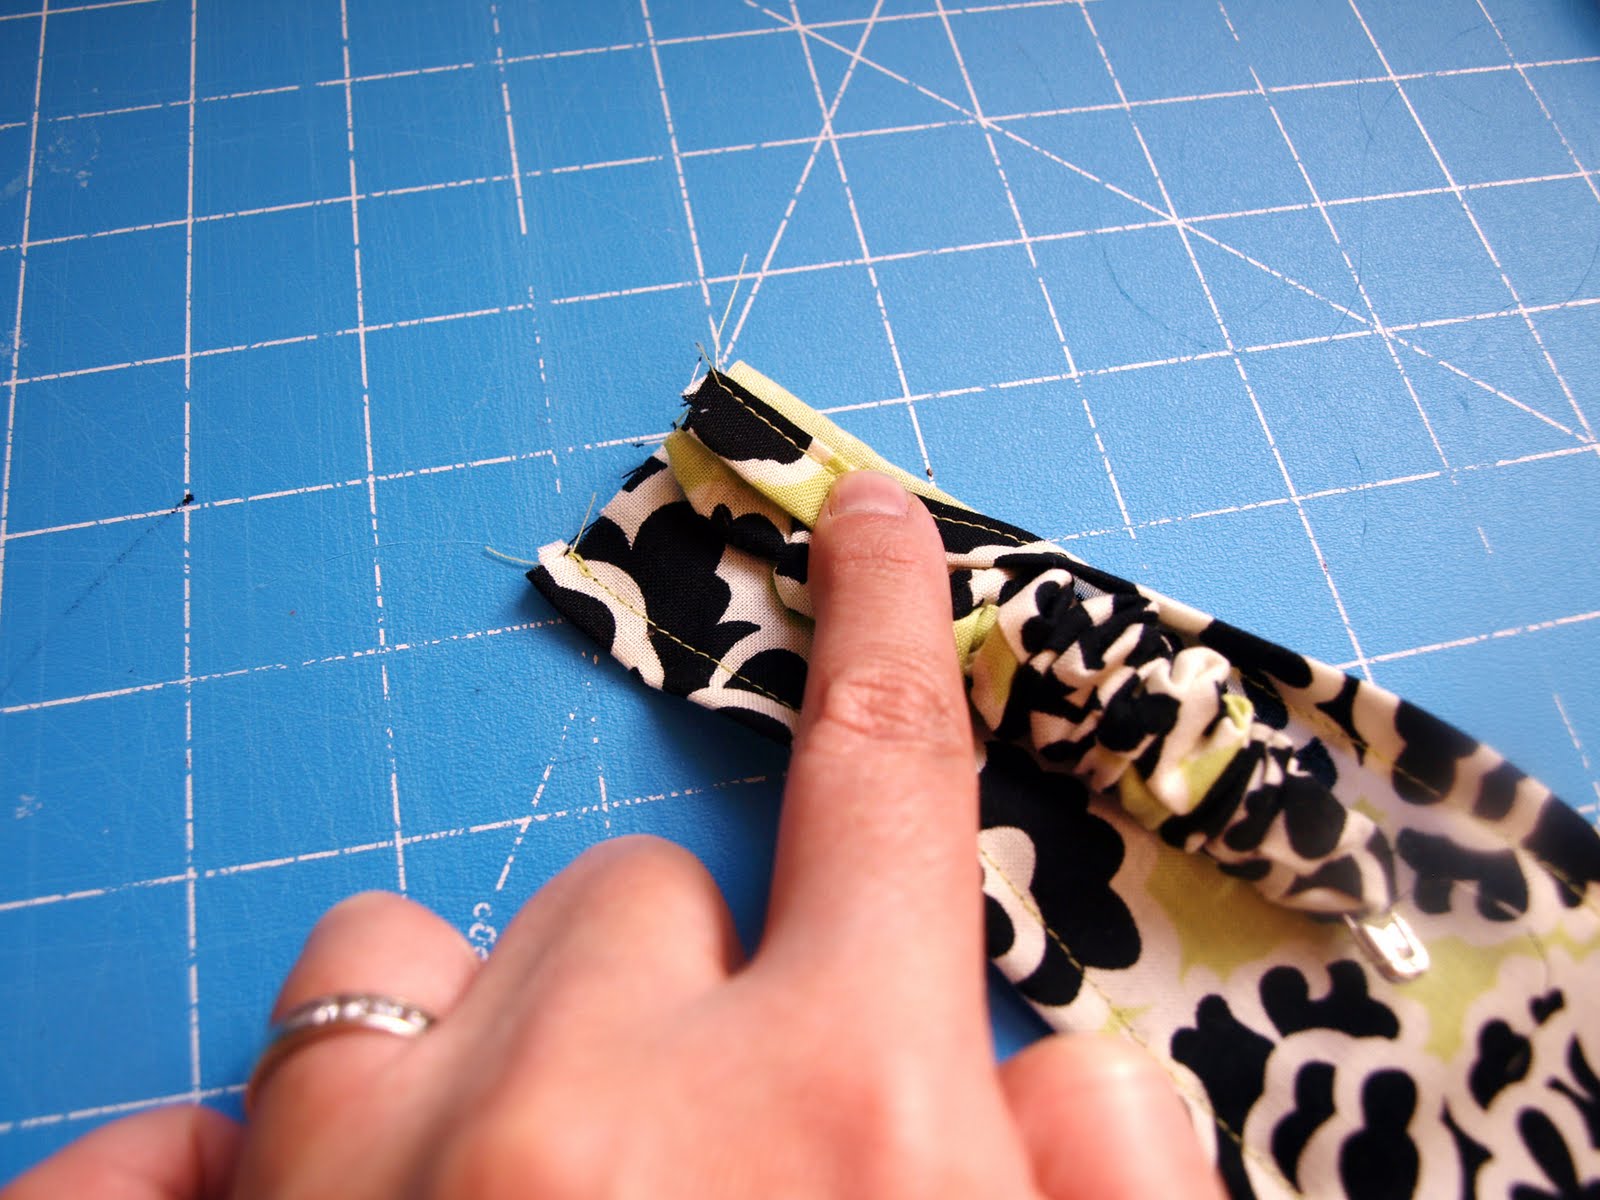

Fold over the right side of the wider fabric to overlap the elastic and fabric tube piece.


Fold over the left side of the wider fabric just as before so it overlaps the elastic, the tube and the other side of the wide fabric.


Stitch over all layers to secure.


I like to use a zig-zag stitch a few times, backstitching at the beginning and the end just to make sure everything is nice a secure.


This is what your newly sewn side will look like when you flip it over.


Now take your pinned edge of elastic and place it on the un-sewn edge of the wide piece. Line up the edges of the elastic, the tube and the wide piece -right sides together - just like before.


Overlap pieces so wrong sides are facing up again.


Zig-zag stitch one more time across all layers like shown.


Flip your headband so the right side is facing out and you're done.


Thanks for checking it out!


Sunday, August 8, 2010

t-shirt and tulle flower headband


Have you ever had a t-shirt that you've been holding onto for just a tad too long? It's not like you actually wear the thing - well - maybe occasionally, during an extremely bad clean-clothes drought. Well, that's exactly what I had. Time to dump it or burn it, right? Well, let's just up-cycle it into a new flower hair accessory. Duh!

The aforementioned t-shirt just happened to be grey. I've really been into grey lately, it might even be my NEW favorite color over green. SHOCKER! Must be the gloomy, doomy rain I guess. (And nothing against the rain of course. Rain - I love you! hehehe).

I picked up some shiny grey tulle to go with the grey t-shirt for our flower. Let's begin, shall we?


Supplies:
T-shirt
Tulle
scissors or rotary cutter
sewing needle and thread
small beads
glue
felt
headband (or hair clip)


First start by tracing you circles onto your t-shirt. Decide how many circles you'll need. I cut out two sizes of circles, two sizes for each flower. I made three flowers for my headband so I needed three big circles of t-shirt and tulle, and three small sizes.


After all pieces were cut out I stacked the circles. Alternating between large t-shirt circle, large tulle circle, small t-shirt circle, small tulle circle.


Hand sew in center of each flower until secure.


Then add beads until they are secure as well.


Now, arrange your t-shirt/tulle flowers to your desired look.

Cut out a piece of felt. **If you will not be putting these on a headband just glue one flower straight onto your hair clip, and you're done**


Glue your flowers onto felt piece, trimming excess felt if necessary.


When finished, glue second piece of felt to the bottom of the felt piece that the flowers were just glued to. Leave a thin strip unglued (wide enough for your headband to slide through, if using) down the center of the felt. Just slip your headband through the unglued part and...READY!? You're done. Go wear it - you know you want to!


Thursday, May 6, 2010

Easiest headband


Here is probably the simplest headband. Aside from the good old 'tie a ribbon around your head' kind.

Get any kind of decorative trimming that you like from the craft store (make sure it has elastic). I must have a thing for sequins lately, so that's what kind of trimming I got.

Measure your or your kiddo's head. Ry-pies measured 17" so I just got a 1/2 yard. Then just hand stitch it together. Had I not been using sequins it would have been even easier just zipping through on my machine.

All done. Less then $3 bucks. And under 5 minutes. Yeah!


And either I have a pin head or baby girl's head is huge....because the headband fit me too. Double yeah!!!


Friday, April 2, 2010

Satin petal headband


I got this inspiration from the cover of one of the Pottery Barn kids catalogue. A little girl was wearing a super sweet little floral headband, (which of course was not for sale) so I decided to see if I'd be able to whip one up......and ta-dah! You like? I know I do!

(And let me apologize in advance for the lack of tutorial pictures. I didn't take very many during the making of the headband.)

First, I just cut several petals from some satin fabric. I used 16 petals for this flower.

Satin will fray, so I just took a lighter and (very lightly) heat sealed all around the edges. note: be careful not to apply too much heat to the edges because you don't want them to singe. Unless you like the burnt edged look and if so, just disregard. :)


Next, just layer each petal overlapping and overlapping until you reach your desired design. And then just hand stitch together.

Then I took a rectangular strip of the satin (heat sealed)...

and twisted it.

Then I just coiled it up as shown below. (And excuse the extremely, and kind of gross looking finger nail. I had just peeled Caleb and orange and some of the pith was stuck underneath.....gross I know). And sew this onto the center of your flower.

I attached mine to a green ribbon headband I made. But it could be glued onto a clip to attach to any type of headband.


It kind of reminds me of a lotus flower. I like it and will be perfect with Ry-pie's Easter dress.

Related Posts Plugin for WordPress, Blogger...