Wednesday, April 20, 2011

F-I-V-E

Five years ago today something changed me. My purpose in life became clear. I became the mama to the sweetest little boy.

My little Cal J is growing up. He's been growing non-stop for 5 years.


He's kind, funny, friendly, compassionate, and loves taking out the trash.


Thanks for letting me love you as much as I do. And thanks for being such a great big brother and a fun-loving son to me and your daddy. We love you so much Cal J!!!

HAPPY BIRTHDAY!


Friday, April 15, 2011

Finally, I'm back (with some cookies)

After months of being camera-less from our aforementioned robbing. I finally made a decision and picked out my new camera. Woo-hoo! My life feels whole again. ;)

Now let's see if I even remember how to post one of these anymore... ah yes, it's coming back to me.

Easter is just around the corner and these little morsels (Cadbury mini-eggs) make me salivate. Thankfully they only come out once a year. Do yourself a favor - buy a bag - and make some cookies!


Here is a wonderful little recipe from Our Best Bites which you can find here. What if you don't like these little chocolate wonders? My heart goes out to you my friend!


They're wonderfully delicious!

Saturday, January 15, 2011

A set back...

This year had been off to a wonderful start. That is until last week when our house was broken into. We're now left feeling totally violated and more then slightly ticked off. Needless to say, the thieves took off with lots and lots of stuff. Luckily, no one was home and most of the stuff can be replaced - it's just costly stuff, and it was our stuff, and it kind of makes me angry.

So for the time being I'm computer-less. And camera-less. And totally out of sorts about it. I'm still crafting, I just won't be documenting it at the moment. (They left my sewing machine at least).

Soon.

Hopefully real soon. Cause I really miss it.

I hope things have been better for you all....


Monday, January 3, 2011

Fleece hat

Happy 2011 everyone!

To start off the new year I made a little something for Cal J. A super easy fleece beanie. Here's how you do it.


Cut out your beanie from two different fabrics. One for the lining and one for the outer hat. You should have a total of 4 pieces. I used one of his beanies and traced it adding an extra 1/4" for seam allowance. And cut it 10" in length.

***Note: I should have actually allowed more width to the beanie. I'd suggest marking it a 1/2" wider all around the beanie your tracing. ***


Fold over the lining like shown...


and cut a slit 2 inches deep straight down. Repeat with outer pieces of hat.


Your slits should look like this.


Fold your fabric so it's in half again and sew your slit closed using a 1/4" inseam, backstitching at the beginning and end. Do this on all 4 pieces.

I got ahead of myself and didn't take pictures of the next step - just pin your fabric together with the seams you just sewed facing out and sew together.


Now you should have two hat pieces. Both with seams facing out.


****Leave a 3 inch opening towards the top of your lining piece like this. Be sure to backstitch at the beginning and the end of the opening****


Leave your outer piece inside out and turn your lining piece right side out like shown.


Place your right side out lining piece INTO the outer hat piece.


Stuff all the way into the outer hat piece lining up the seams. Pin in place.


Sew all the way around the hat opening so the outer and the liner are sewn together.


It should look something like this.


Now pull the lining piece outward so you have one big oval shape with the seams facing out.


Now take your un-sewn opening on the lining piece and start to pull the hat right side out.


Keep pulling....


Here is the hat with the right sides out. Hand stitch the opening that you just pulled your hat through shut.


You're almost finished...


Now just fold upward so some of the lining is showing and you're done!


Now, I know I said this was for Cal J. But apparently my measuring was off. It fit Ry-pie's head perfectly. I'll guess she'll be sporting a cool alien hat. Oh well.

I hope your new year has been off to a great start!


Thursday, December 30, 2010

Melted snowman cookies


It's been a pretty frigid winter thus far - and it's only the beginning. Yikes!

Here are some melted snowman cookies that I made.

I originally saw them from Smashed Peas and Carrots, go here for the recipe and directions.


I have a feeling that people in certain parts of the country really wish they had some snow melting!

Enjoy! And stay warm out there! :)


Tuesday, December 28, 2010

Fabric headband

Christmas is over. It went by too fast - as usual. Now maybe I can get back to some non-gift-giving-craftiness, and get back to sharing some easy tutorials with you. That's my plan anyway - but please don't hold me to it. :)

Here's an easy little fabric headband that I made for Ry-pie.


You'll need:
Some fabric. I used a 1/4 yard and could have made a couple. You'd probably be fine with at least an 1/8 yard
Rotary cutter
3/4" elastic (length varies to your size of headband)
Sewing machine and thread

Cut out your fabric. This one was 4" wide and 16" long.


Hem each long side. Fold over each long side 1/4" and iron...


Fold over another 1/4", iron and pin. Do this for both long sides.

Sew up each long side, close to the folded edge.


Take a 2" piece of fabric (mine being 8" long) and fold in half, right sides together. Sew long sides together, backstitching at the beginning and end.


Turn material inside out as shown here to create a tube. Cut elastic piece. (This one being 4").


Place safety pin on one end of elastic and feed it through the tube.


You're fabric should be completely scrunched up onto the elastic like this. Attach you safety pin to one end of the elastic AND the fabric so they are pinned together. **Keep your finger on the other end of elastic and fabric so your elastic doesn't go back into the tube. **


Place the unpinned side of the elastic (making sure the edge of the elastic is lined up with the edge of your tube) seam side up onto the right side of the wider headband fabric.


Fold over the right side of the wider fabric to overlap the elastic and fabric tube piece.


Fold over the left side of the wider fabric just as before so it overlaps the elastic, the tube and the other side of the wide fabric.


Stitch over all layers to secure.


I like to use a zig-zag stitch a few times, backstitching at the beginning and the end just to make sure everything is nice a secure.


This is what your newly sewn side will look like when you flip it over.


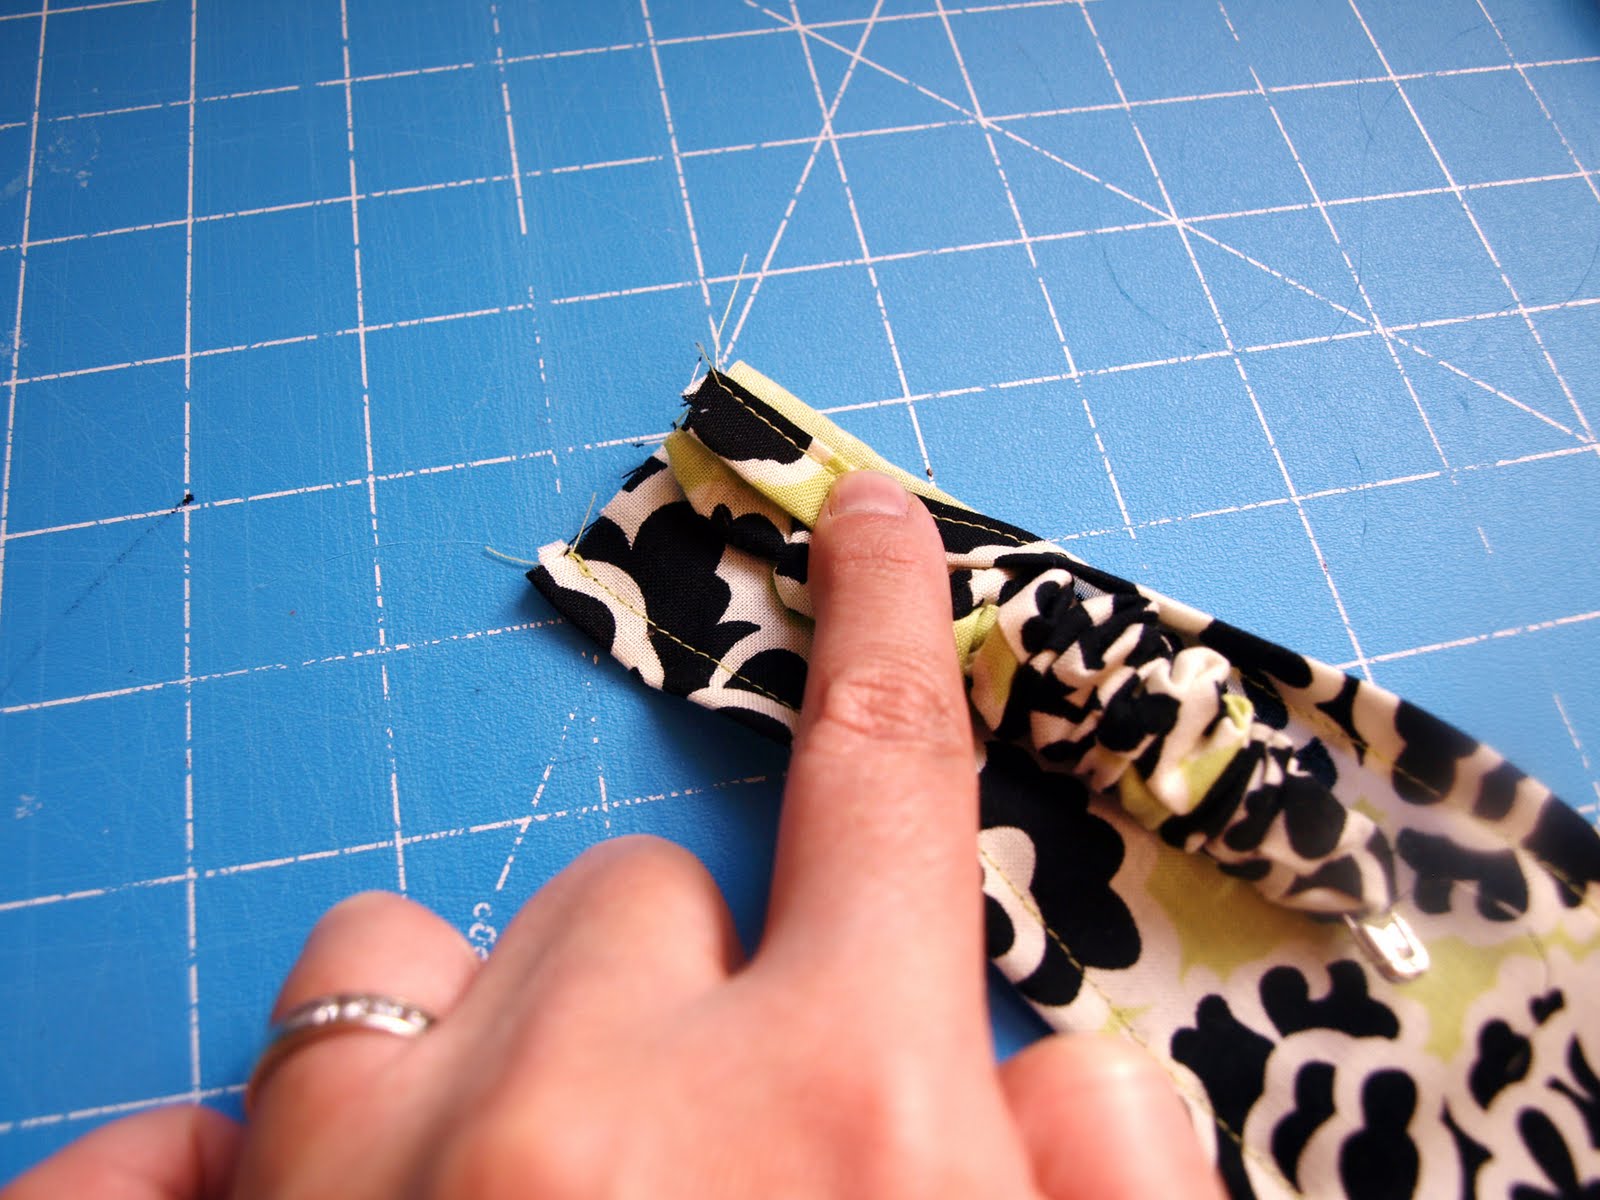
Now take your pinned edge of elastic and place it on the un-sewn edge of the wide piece. Line up the edges of the elastic, the tube and the wide piece -right sides together - just like before.


Overlap pieces so wrong sides are facing up again.


Zig-zag stitch one more time across all layers like shown.


Flip your headband so the right side is facing out and you're done.


Thanks for checking it out!


Related Posts Plugin for WordPress, Blogger...