Tuesday, June 21, 2011

Fabric Headwrap

Today's the first day of summer!

Here's an easy little tutorial to make your own fabric headwrap. Super easy, and cute!


Start off with two seperate pieces of material (one printed for the outside and one solid piece for the lining). These were 45" long and 5" wide.

Don't be lazy like I was. Please iron your fabric! :)

After I finished this project I realized that 5" wide was too thick for me, so I wore it folded it in half. That worked just fine but you might want to cut down your measurement to about 2.5-3" wide if you didn't want to have to fold it over.

Take your material and place right sides together.

Sew along the outer edges all the way around using a 1/4" seam allowance. Leave a 1-2 inch opening at one end of your wrap.

Trim around the entire "sewn" part of your wrap, making sure not to cut into the seams. Clip an angle at each corner as shown below.

Turn your wrap right side out and use a dowel or the eraser end of a pencil to push the corners out.

Fold the material in from the un-sewn opening at the end of the wrap and press.

Top-stitch around the entire wrap using a 1/4" seam or less.


And there you have it. Perfect for summer!


Thursday, June 9, 2011

Re-covered Bar Stool Cushion

I've been slowly updating things around the house. It must be this pregnancy thing - because I'm in serious nesting mode!

I found this wonderful printed fabric at Jo-Ann's - and it was 50% off. Score! I decided it would be nice to update our bar stool cushions using it.


Can you see why I wanted to update them? Pretty gross right?


I used the existing cushion as a sort of template for the fabric. I folded the fabric in half and laid the cushion on top of the fabric. I added 3 more inches around the existing cushion to allow for the wrap around of the new cushion.


These marks indicate where I decided to cut the fabric.


I cut out two circles since I was making two cushions.


Serge around your entire circles. If you don't have a serger you can use a zig-zag stitch or even cut out the circle using some pinking shears.


Now take some elastic. I used a pretty thin size of elastic (I don't remember what width though, sorry).


Here's how to make your cushion cover so it will hug the actual stool. Take your elastic and line it up on the serged (or zig-zagged) edge. Manually move your needle down so it will keep your elastic in place. Before you begin sewing pull your elastic really tight so you have no slack over the elastic you'll be sewing. Go real slow, and make sure that you are catching the elastic and the fabric together. Go around the entire circle, continuing to pull the elastic so it's always tight while you sew. Don't forget to backstitch at the beginning and end!


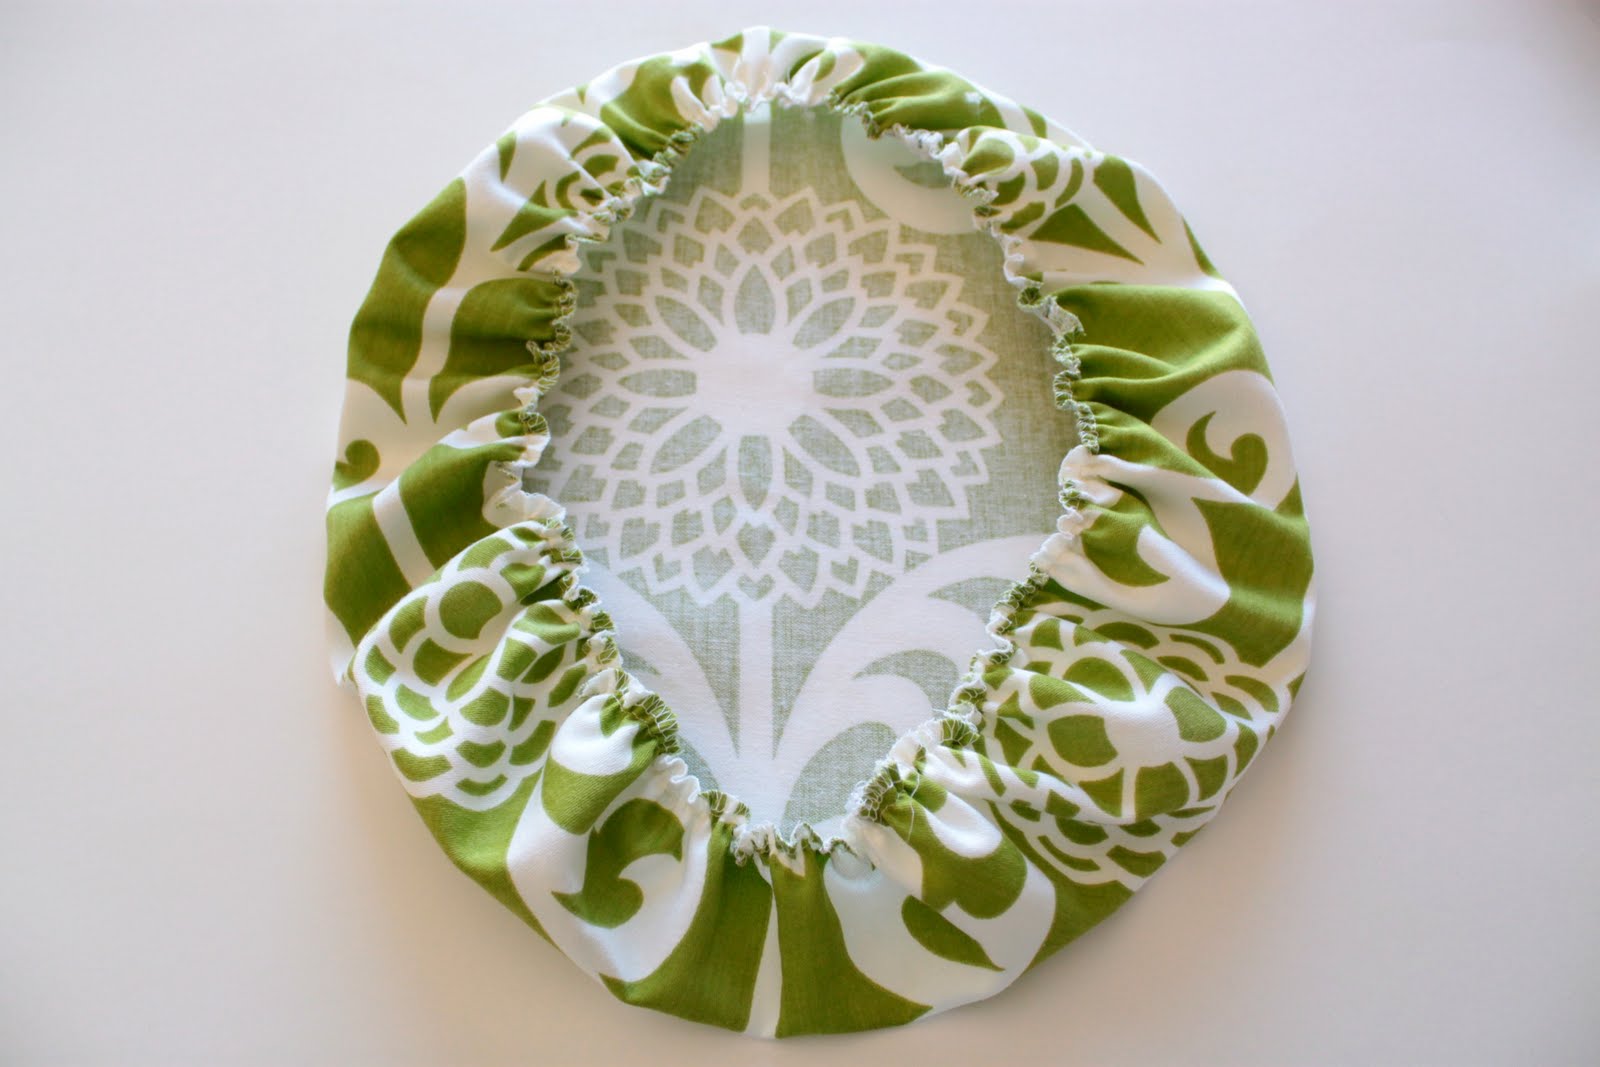
When you are done and you let go of the elastic it should end up puckering up like this.


This is what the underside of your new cushion cover should look like.


At this point you could leave it like this and cover your old seat cushion. I wanted to "polish" it up a bit so I added some button details.

Start off with a button cover kit like this one.


I ended up cutting the old seat cover off so I could still use the cushion for the stool. I handstitched each button to the cover and through the cushion so the buttons were nice and secure.

After sewing on all four buttons this is how it turned out. A much better looking bar stool cover that I can live with. I love fabric! It's amazing how much it can beautify your ugly things. :)


I want to sand and paint the bar stools next but that will have to wait!


Thanks for reading!


Monday, June 6, 2011

Easy Smocked Top


Have you ever seen this smocked material at the fabric store before? I'm sure you have. I've been wanting to try it out and use it for awhile now and finally got around to giving it a whirl. They have all sorts of prints and lengths to choose from. I chose the simple white one in the shortest length to make a little shirt for Ry-pie.

Here's how I put it together :


Measure around your little ones chest. Ry-pies chest measured just shy of 19" so I cut the fabric at 19 1/4" to allow for a little seam allowance.

Place cut sides, right sides together and serge. If you don't have a serger just sew up the side and then zig-zag stitch or cut with pinking shears to prevent fraying.


Take some ribbon. I didn't have any white grosgrain ribbon so I used this skinny little satin ribbon for the straps.

I put the shirt on Ry-pie and measured how long I wanted the straps and decided where to place them. Since these straps are so skinny I cut 4 sets of ribbon, 3 ribbon per set - all 10" long.

I marked the placement of the straps with my straight-pins.

I placed the ribbon on top of the first and second rows of smocking. I then sewed the ribbon across each of the smocking to make sure it was nice and secure.

And there you have it! An easy and nice and breezy little smocked top! :)

I love the tie-straps at the shoulders....

that is if your little one doesn't keep un-tyeing them.

She looks super thrilled doesn't she?

A definite diva with her hand on the hip move.


Friday, June 3, 2011

No-bake berry pie


Here's a delicious little recipe that we enjoyed on Memorial Day. Perfect for anytime when the weather is nice, especially because you don't have to heat up your oven!

Ingredients:
a pack and a half of Oreos
mixed berries (I used raspberries, strawberries, and blueberries)
one large container of Cool Whip
one package of cream cheese (softened)
1/4 C butter (melted)

In a food processor, grind Oreos into fine crumbs.

Add melted butter and mix together.

Press crumb mixture into pan. I used a spring-form pan but a pie dish would work just fine too.

In a separate bowl mix cream cheese until nice and smooth.

Add entire of container of Cool Whip and fold gently into cream cheese.

Layer cream cheese/Cool Whip mixture onto crumbs. Smooth out so the surface is relatively even.

Place your berry mixture on top of your Cool Whip mixture, and refrigerate for at least an hour.

If using a spring-form pan simply slide out. If using a pie plate just cut and serve from that.

Super delicious!


Tuesday, May 31, 2011

Ry-pie's First Haircut

Ry-pie's turning 2 at the end of June. She's yet to have a haircut. I guess with all those curls I just didn't think it was necessary. That is until this tiny tendril kept driving me crazy! It's so weird, this one perfect curl about 2 inches longer then the rest. I finally decided to give her a little trim.

Snip, snip.

She didn't even notice.

And I feel much better.


Now, if I could only get the front under control!


Related Posts Plugin for WordPress, Blogger...