
Christmas is over. It went by too fast - as usual. Now maybe I can get back to some non-gift-giving-craftiness, and get back to sharing some easy tutorials with you. That's my plan anyway - but please don't hold me to it. :)
Here's an easy little fabric headband that I made for Ry-pie.

 You'll need:
Some fabric. I used a 1/4 yard and could have made a couple. You'd probably be fine with at least an 1/8 yard
Rotary cutter
3/4" elastic (length varies to your size of headband)
Sewing machine and thread
 Cut out your fabric. This one was 4" wide and 16" long.
  Hem each long side. Fold over each long side 1/4" and iron...
 Fold over another 1/4", iron and pin. Do this for both long sides.
 Sew up each long side, close to the folded edge.
  Take a 2" piece of fabric (mine being 8" long) and fold in half, right sides together. Sew long sides together, backstitching at the beginning and end.
 Place safety pin on one end of elastic and feed it through the tube.
  You're fabric should be completely scrunched up onto the elastic like this. Attach you safety pin to one end of the elastic AND the fabric so they are pinned together. **Keep your finger on the other end of elastic and fabric so your elastic doesn't go back into the tube. **
 Place the unpinned side of the elastic (making sure the edge of the elastic is lined up with the edge of your tube) seam side up onto the right side of the wider headband fabric.
 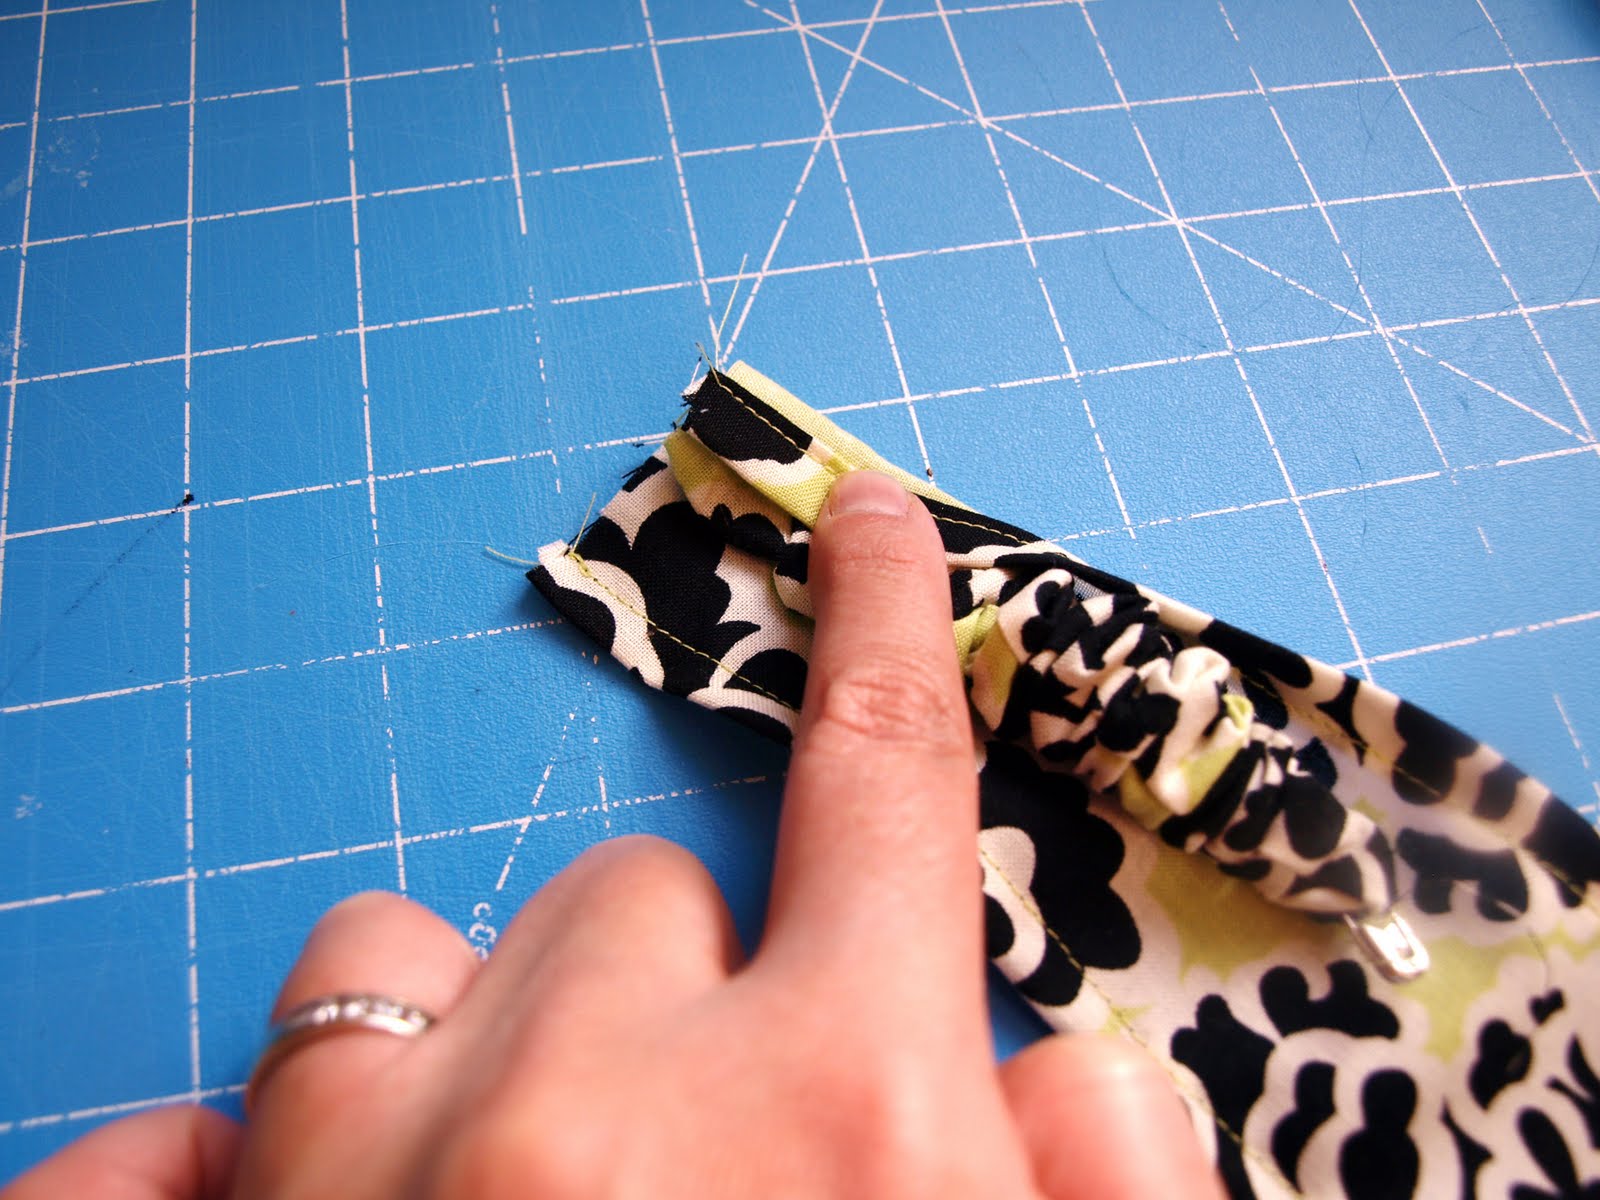 Fold over the right side of the wider fabric to overlap the elastic and fabric tube piece.
  Fold over the left side of the wider fabric just as before so it overlaps the elastic, the tube and the other side of the wide fabric.
  Stitch over all layers to secure.
  I like to use a zig-zag stitch a few times, backstitching at the beginning and the end just to make sure everything is nice a secure.
  This is what your newly sewn side will look like when you flip it over.
  Now take your pinned edge of elastic and place it on the un-sewn edge of the wide piece. Line up the edges of the elastic, the tube and the wide piece -right sides together - just like before.
  Overlap pieces so wrong sides are facing up again.
  Zig-zag stitch one more time across all layers like shown.
  Flip your headband so the right side is facing out and you're done.
Thanks for checking it out!

That's really pretty! This would be so much fun to make for my girlfriends on Valentine's Day! Thanks for the great tute, I'll be linking.
ReplyDeleteI just made this for my little one while she was napping. So quick, easy and super cute! Now to see if it will fit her! Thanks so much for the great tutorial!
ReplyDeleteThat is so uber cute. I've been wanting to sew headbands, and this is perfect. Thanks for sharing!
ReplyDelete