Friday, July 29, 2011

Frozen Fruit Pops

I saw this beautiful picture of these delicious popsicles the other day. It didn't have any directions on how to make them but it mentioned using Capri-sun juice pouches and sliced fruit. We usually have both of those things on hand in this house - so I decided to give it a whirl.


What you'll need:
Capri-sun (or any light colored juice)
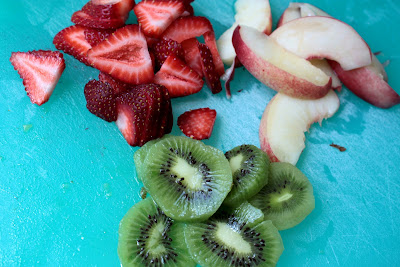
Assorted sliced fruit (we used kiwis, strawberries, and nectarines)
Popsicle mold

Slice up your assorted fruit


Fill up your popsicle mold about 1/2 way with your juice.


Let (clean) little hands fill up the molds with the sliced fruit


Let freeze. We left ours in the freezer overnight.


That's it! Easy and adaptable. The different fruit and juice choices are seemingly endless.


Eat up and enjoy!


Monday, July 25, 2011

Braided-trim tank

Here is a cute little tutorial for a tank I made Ry-pie. The braided-trim adds a fun touch.


I started with a little camisole of Ry-pie's. I folded the cami in half and placed the folded cami on top of the material I was cutting. (Be sure that your fabric is also folded along the same side as the folded cami). Cut two pieces.

I used a cotton knit for this tank. If you had an old t-shirt to use that would be great too!


This cami was a touch snug on Ry-pie so I added an inch to the length and the sides. I also made the straps thicker so it would be a tank instead of a cami.


You should have two identical pieces of your cut fabric. One front and one back.


Place the tank pieces right side together and sew or serge along the sides and the top of the shoulder straps.


Turn your tank inside out.


Next, cut out strips of the same fabric for your braided trim. I just measured around the arm-hole and the whole neck-line and added 1 1/2" to the measurement. Each strip was 1" in width.


Take three strips (of the same length) and secure them together with a safety pin. I pinned them to my jeans so I'd be able to braid them up real fast. Braid the pieces together.


Take your braided strip and pin it around whichever opening the braid is for. Pin it so the edge of the braid is flush with the opening of the tank.


Sew your braid to the tank. Try and sew as careful as you can down the center of the braid - making sure you catch the tank with each stitch.


When you're all done it should look like this.


All done!


Wednesday, July 20, 2011

Paint-chip garland

I'm adding a few finishing touches to Ry-pie's (and new baby's) room. Here is the simplest little garland that was made out of nothing other then paint-chips! I saw the idea here, and it couldn't be easier!

I picked up some paint-chips during my last spray-paint excursion to the hardware store. I chose an array of colors that would match the room.


I then punched out the paint chip using a flower shaped punch (any shape would be fantastic).


After each chip was punched, I strung each flower together by sewing them through my sewing machine.


The whole strand came out like this.


Then I hung it up on some shelves. That's it! I want to make another one to drape across the opposite corners of the shelves. Luckily, this is the cheapest little project you can do cause it's free - unless you're buying spraypaint of course! ;)


Thursday, July 14, 2011

"Washer" Art

I'm slowly piecing the house together getting ready for baby number 3. Less then 6 weeks to go!
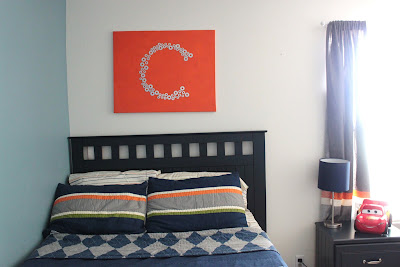
After Cal J and Ry-pies's room switch - Cal J's room has been lacking in the "wall hanging" department. I saw this fantastic idea to use washers (you know, from the hardware store) to create a design on a canvas. I love it!


The supplies:
Canvas
Spray paint (optional)
Washers (various sizes)
Glue (I used E6000)


I've been slightly obsessed with spray paint these days - so anything (and everything) that I can spray paint I will. I spray painted the whole canvas first and let dry.

Josh doesn't think it's a good idea in my "condition" to be spray painting items. But rest assured, I always do it in a well ventilated area and do my best to not inhale . :)

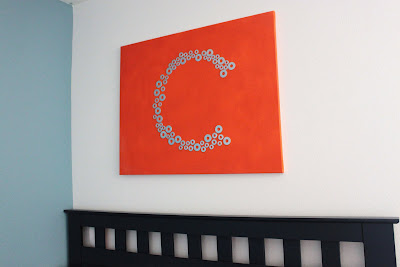
After the paint dries I just placed my washers in their desired place and glued them on. That's it! A "C" for Cal J. His nonchalant response when I showed him: "cool mom". I wanted a little bit more excitement, oh well, either way I LOVE how it turned out.


Have a great day!

Friday, July 8, 2011

Strawberry Ice Cubes

It's so hot outside. I mean H-O-T!
I made this delicious treat for us to cool down on the 4th of July.

Combine:
1 cup water
1/2 cup sugar
In a saucepan, bring to boil.
Add:
1 pint strawberries
and continue to boil for 5 minutes.

Mash up sugar and fruit mixture (I left mine kind of chunky, but if you wanted a smoother consistency you could puree it).


Place mixture in a ice tray and let freeze for at least 3 hours.


When ice cubes are frozen just add to glass.


And then pour in your lemonade - or any other drink that grabs your fancy.
I used this recipe for the fresh-squeezed lemonade.


The ice cubes gradually melt down and add more strawberry goodness to your glass.

Enjoy!

Wednesday, July 6, 2011

Artwork for the Loo

The kids bathroom needed some artwork and I happened to have some canvases laying around. I thought it would make for a fun little project for the kids to create their own artwork to hang in their bathroom.

I chose the colors that matched with their shower curtain and accessories...

...and I let them get to work


You might be thinking how clever I am to have them paint with no clothes on. Nope! Naked is just how my kids spend most of their day around our house. It is nice when laundry day comes though!

She wasn't too happy about getting her hands dirty!


Ry-pie's work...


...Cal J's work.

Thanks for checking it out.


Related Posts Plugin for WordPress, Blogger...